Wednesday, December 28, 2011

Charlotte Baby Quilt

I'm loving quilting, but I'm having a hard time justifying the cost.  I mean, how many blankets do we need?  However, if I make quilts as gifts, then it's okay, right?  :)  So my second completed quilt was a little baby quilt that I mailed off to a friend for her little girl.  It was much harder than I thought it would be to give it away!


The pattern is "Charlotte" from Three Times the Charm which you can find here or Amazon.   (It's cheaper shipping through Amazon.)  I added another row to make it a little larger.  The pattern calls for the octagons to be a neutral color, and the in between space to be the patterned material.  I decided I wanted to change it up a little and swapped it.


This is only my second time doing free-motion quilting, and I decided to try a different pattern.  I did a modified dogwood pattern.  You can find directions for it here at Oh, Fransson!  I didn't want the lines between, so that is where the modification came in.  I would leave one section of the flower open then more on to the next one.  Once I made it through the whole thing I made my way back to the beginning by closing up each section.  It worked great!


I hope my friend and her little girl enjoy it!


Thursday, December 22, 2011

Why do I sew?

My little one L.O.V.E.S. stuffed animals.  She talks to them, tickles them. has us tickle them, gives them kisses, and uses them to "get" us.  So imagine how sad I was when one of her favorites split a seam.


Poor Bear!
This bear has been the victim of many hand-washings which probably caused the split seam.  He's looking pretty rough these days. :)  It took me a while to get to him, but I finally sewed him up the other day.  I'm so glad I have the resources on hand (I know it doesn't take much) and I'm not intimidated by a thread and needle (I would have been a few years ago).


Reunited!
So she can have a "whole" bear once again.

Merry Christmas!


Tuesday, December 20, 2011

Crocheted Long Stocking Cap

**Update - the tutorial is now up.  Check it out here.**

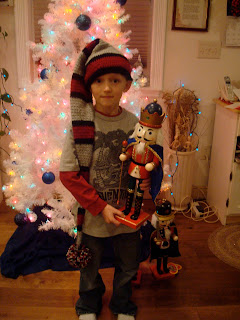
When I asked my sis-in-law what her 9 year old would like for her birthday, she didn't hesitate before answering "a VERY long stocking cap with a yarn ball on the end."  After searching online I didn't find any crochet patterns that I liked so I decided to see what I could come up with.


I've crocheted quite a few hats so I had a basic idea of what to do.  I just started with a much smaller first round and very gradually increased it.  I love how it turned out, and my nephew loved it too.  In fact, his older brother has now requested one for his birthday in January.

I know he isn't smiling, but I promise he likes it. :)
It ended up being three feet long!  It went past his waist.  As long as his head doesn't grow too much it should last him for quite a while!

Indy had to try it on before we gave it to him.
I'm going to clean up my notes while I make the second one.  Then I'll post it as a free tutorial on here.  Keep an eye out for it!

Monday, December 12, 2011

Embroidery Hoop Christmas

One day I plan on using embroidery hoops to decorate my little girls room, so I've been picking them up at second hand stores whenever I see them.  I came upon my stash in a closet a while ago and started brainstorming how I could use them for Christmas decorations, and here's what I came up with.

Meet Mr. Snowman


Different sizes of embroidery hoops, circles, winter...a snowman, of course!  I think the hat is my favorite part.  I used a cashew can, and a random plastic lid I found in my cupboard.  I cut them both in half and covered them in felt.  I think he's got personality!  My little one definitely likes him. :)


Add some buttons, pom poms, a felt nose, and ta-da!

Fabric Snowflakes


At first I thought it would be cool to have just the snowflakes stretched through the hoop with no background.  Then I decided that would be a nightmare to make work, so I settled on some contrasting  material to put them on.


I found that using starch on the material helped.  It also helped to place some pins in it to keep it folded while I was cutting the snowflake.  I would also recommend using THIN material.  It gets to be a lot to cut through after you fold it several times.  You can find TONS of templates and ideas for cutting snowflakes online.  I decided to use some of the six point patters that I found.


I used some spray on fabric glue to put them on the background.  It worked great!  Some parts of my snowflakes weren't staying together because I cut too far, but I was still able to use them.  Once I glued them on you couldn't tell some of the snowflakes were in pieces.

I think I want to add some sort of garland around them to make them look more finished, but I haven't gotten to that yet.

Goldilocks and the Three Slouchy Crochet Hats


This is the story of Goldilocks and the Three Slouchy Crochet Hats.  When she was fairly new to crocheting she found an adorable free pattern here and decided she'd give it a try.  The pattern calls for cashmere yarn, but Goldilocks couldn't find any.  So she decided to go with an extra bulky, heavy yarn hoping that the weight would create the drape effect.

It didn't.  Luckily before she got too far, she realized her choice of yarn was resulting in too stiff of a hat.

Partial hat with thick yarn that made it STIFF


Then she found a wonderful super soft yarn that she thought would work well.  She worked and worked on the hat and was pleased with its progress as it came along.  When she finally finished the hat she was a little worried though, it looked a little small.  The hat was intended for her adult sister, but it didn't look like it was going to fit her.  Maybe her daughter?  No.  The hat wouldn't even fit Goldilocks' little girl that was less than one year old at the time.  Can we say doll clothes?


So she found a different yarn and tried again.  Success!  Finally an adorable hat that would fit an adult and that wasn't super stiff!


Thanks for putting up with the Goldilocks story.  It seemed to fit this escapade.  This is a pretty simple pattern that goes quickly.  I just finished another one for my sis-in-law.  I still can't find any cashmere yarn, but I used Lion Brand Jiffy Acrylic (Bulky weight) this last time and it worked okay.  I use the larger needle the pattern calls for and add the extra round.  I'd still love to get my hands on some cashmere and give it a try.  It looks so smooth!

Sunday, December 11, 2011

Christmas Ladder


I saw a tutorial on how to make your own decorative ladder on Tattertotsandjello.com and I had to give it a try.  I've always loved the looks of using ladders to decorate, but never wanted to fork out the money for one.


I've decided to use mine to display holiday photos and Christmas cards.  I bought the ornaments from a dollar store to keep the decorations fairly cheap, but I did break down and buy the garlands from Joanns.  At least they were 60% off!


Here are a few tips if you decide to make one.  Learn from some of the difficulties I had when I made mine. :)

1. If you don't have one of these doo-dads (a center punch),  get one.


They are great for creating a little indentation for the place you want to drill.  It makes the placement of your hole more precise rather than the drill bit dancing around on the wood before starting to penetrate.

2. Pay closer attention to her tutorial then I did.  :)  I didn't notice that she said to use screws to attach the dowels to the 1 x 4x so I used wood glue first.  Messy and it didn't work as well. :)

3. Use white screws if you have them.  I only had dark grey ones on hand and the paint didn't cover them up as well.

4. Very carefully drill the holes for the screws to make sure they go in straight.  Otherwise the screws will start to push out the side of your dowels.

3. If you use grey screws, put them in a little further than flush with the wood.  (So they are depressed in a bit.)  Then putty over them and sand the putty once dry.  It will help the paint cover them better.

4. I'm fairly new to crafting and haven't "distressed" many things.  So I found some tips that helped me.  A) Sand the areas that would naturally get worn through time and use.  B) Use 60 grit sandpaper first to rough it up then go over the same spots with 120 grit sandpaper to smooth it out.

Enjoy!

Wednesday, December 7, 2011

Log Cabin Quilt Top

It's done!  Well, at least the quilt top is done.  But I was so excited I made it this far I had to share.  In an earlier post I showed you the beginnings of my Log Cabin Quilt top.  It was going to be throw size, then I decided I mind as well make it big enough for a twin.  I'm very happy with how it's turned out so far!


The borders made me nervous.  I knew doing borders incorrectly could end in a skewompous quilt.  And I didn't want that, did I?  So I consulted friends on Facebooks.  I consulted friends through email.  And I went into my local quilt shop and one of the sweet ladies there drew me a diagram and taught me how she did it.  :)  I wanted to have two borders on top and bottom (like on the sides), but it was getting too big and I would have had to trimmed most of the top border off anyway.

Now I need to put this project aside while I work on some gifts.  I'll have to finish the back and quilt it later.

Project linked at Freshly Pieced.